Create an Interview Study
Last updated: June 23, 2026
There are 6 key steps to complete when setting up an Interview Study, detailed below.
Visit our Creating Studies in Rally guide to learn more about how to prepare key components in advance before creating studies, and learn the next steps for conducting each study type after creation.
Create an Interview study
Navigate to Studies from the left navigation bar.
Select + New Study.
Select + Create from scratch to start fresh or Use a template to choose from your team's Study Templates.

Enter a Study Name.
Language defaults to English, or select another option to translate your Study.
Select the Team the study will be created in.
Recruitment defaults to In-house (recruit participants from your own database in Rally).
If you would like to recruit Participants from an external panel (incentives + recruitment fees per participant required), learn how to Create an Interview Study + Recruit from External Panel.
Select the study type Interviews.
Select Continue to open the study builder.
Plan
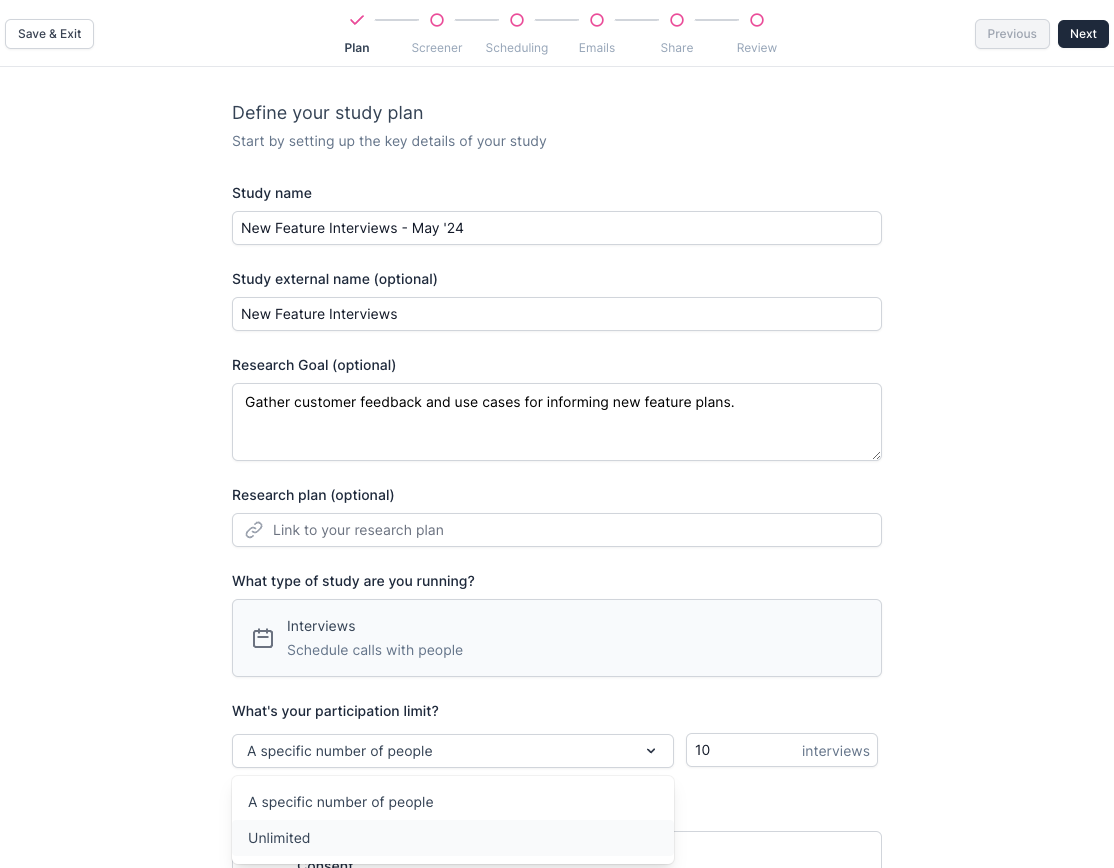
Start by setting up the key details of your Study.
Study Name: Give your study a clear and descriptive name to easily identify it in your workspace.
Study external name: Add an external name for your Study. This can be used with Personalization Tokens to easily add the participant-facing name into emails, etc.
Research Goal (optional; internal): Define the specific goal or objective of your research study to guide your team.
Research Plan (optional; internal): Provide additional details about your research plan, such as methodology or target audience.
Study Type: Confirm the Study type is 'Interview' before proceeding.
Participant Limit: Set a maximum number of Participants for your Study or choose to allow unlimited Participants for continuous research.
Multi-Session (optional): Toggle on Multi-Session to allow participants to book multiple sessions within a single study. This is useful for longitudinal research where you need to meet with the same participants more than once.
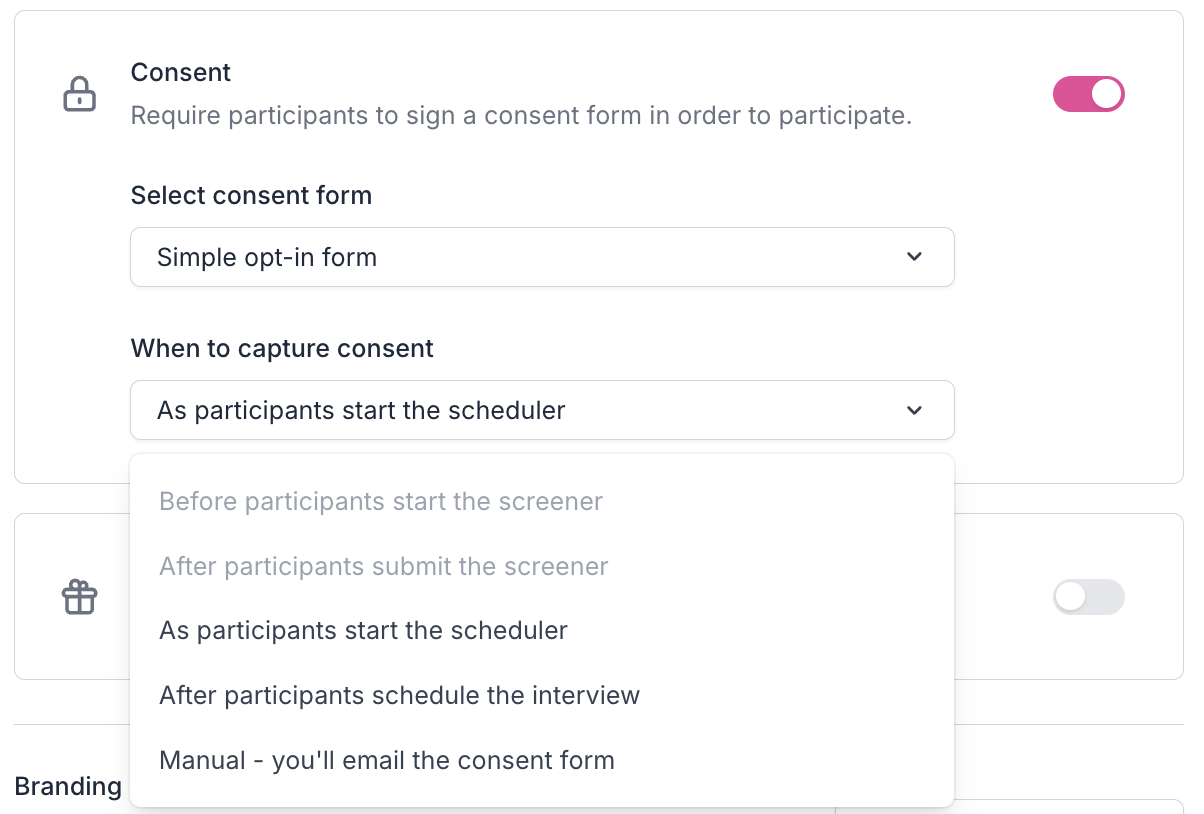
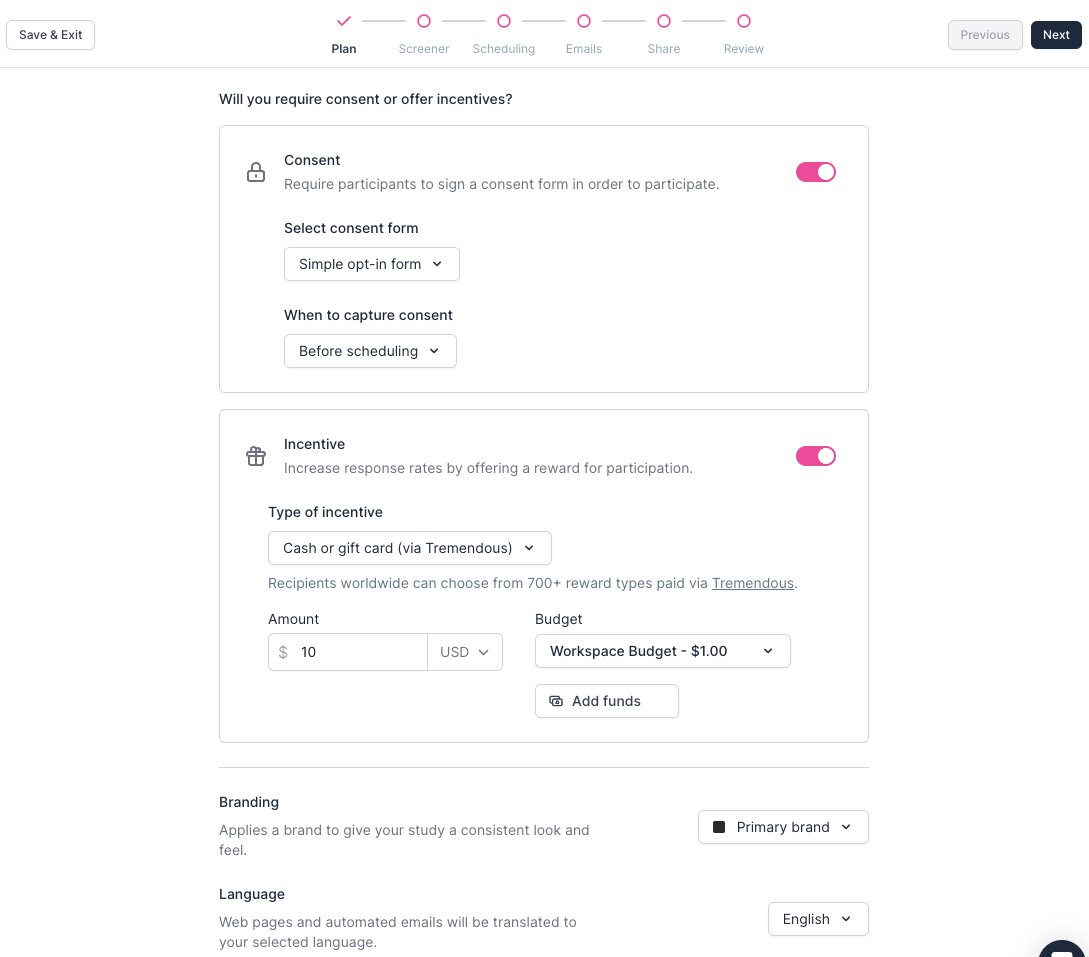
Consent (optional): Add a consent form to ensure Participants understand and agree to participate in your Study. Choose the type of consent form and its placement within the signup process. Learn more about consent placement.
Select consent form: Select the consent form to include from the dropdown.
Upload Documents, such as NDAs, and create custom Consent Forms to select from in Studies.
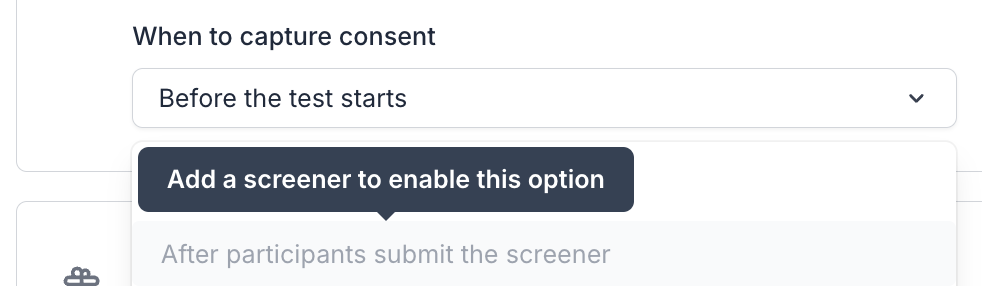
When to capture consent: Decide when to request consent from participants to determine consent placement within the Study by selecting an option:
Before participants start the screener
After participants submit the screener
As participants start the scheduler
After participants schedule the interview
Manual - you'll email the consent form
To capture consent before or after the screener, you'll need to add a screener first before returning to the Plan step to enable these options.
When capturing consent before or after the screener, links sent for scheduling will request consent before scheduling if the Participant has not yet provided consent in this Study (ex: invited to schedule without first being invited to complete the screener+consent).
Learn how to manually email consent forms directly to Participants.
Incentive (optional): Specify the amount or reward you will provide to Participants for their participation.
Users can 'Add Funds' to the selected Incentive Budget here, or wait to add funds before sending incentives later. This may require manager approval.
Learn how to set up, send, and manage Incentives.
Or, use Custom Incentives to log promo codes and alternative incentives.
Branding: Personalize your Study with your company's logo and brand colors to create a cohesive experience.
Set up and manage Brands for your workspace.
You can select None to exclude branding when running research without bias.

Language (optional): Select from the options to translate your study into another language. Currently, each Study can only have 1 language set; for example, choosing Spanish will not show an English option for users.
Note: Web pages, screener endings, and uneditable elements of emails will be translated by Rally to your chosen language, but customizable elements that your team creates or includes (such as screener and survey questions or question templates, email content or email templates, and consent forms) will not be automatically translated and can be prepared in advance by your team.
Screener
Ask the right questions to keep your Participants engaged and gather the best feedback.
Screener tool: Select your preferred screener tool. Rally's native screener tool is recommended for seamless integration with properties and automated follow-ups. You can also choose from our Survey integrations with Qualtrics, SurveyMonkey, or Typeform.
Flexibility with manual management: You can also 'Link to a custom screener' to use an alternative non-integrated survey tool; if you choose this option, reference your selected tool's support documentation to ensure the redirect link is setup based on the tool's requirements for the best chance of seeing screener completion updates in Rally Studies. This is not guaranteed.
Qualification: Choose your preferred qualification method to streamline the workflow for qualified Participants from the 2 options below:
Complete screener without being disqualified: With this option, Participants who complete the screener without encountering any auto-disqualifying answers will automatically qualify for the study.
You will need to set up conditional logic to disqualify participants based on specific question responses, or participants who complete screeners will auto-qualify unexpectedly.
Have a qualifying answer to specific questions: With this option, you can set specific questions in the screener that will automatically qualify Participants based on their answers.
You will need to set up conditional logic to qualify participants based on specific question responses, or participants who complete screeners will not auto-qualify as expected.
Immediate scheduling (optional): Allow qualified Participants to book interviews immediately after completing the screener, without waiting for you to follow up.
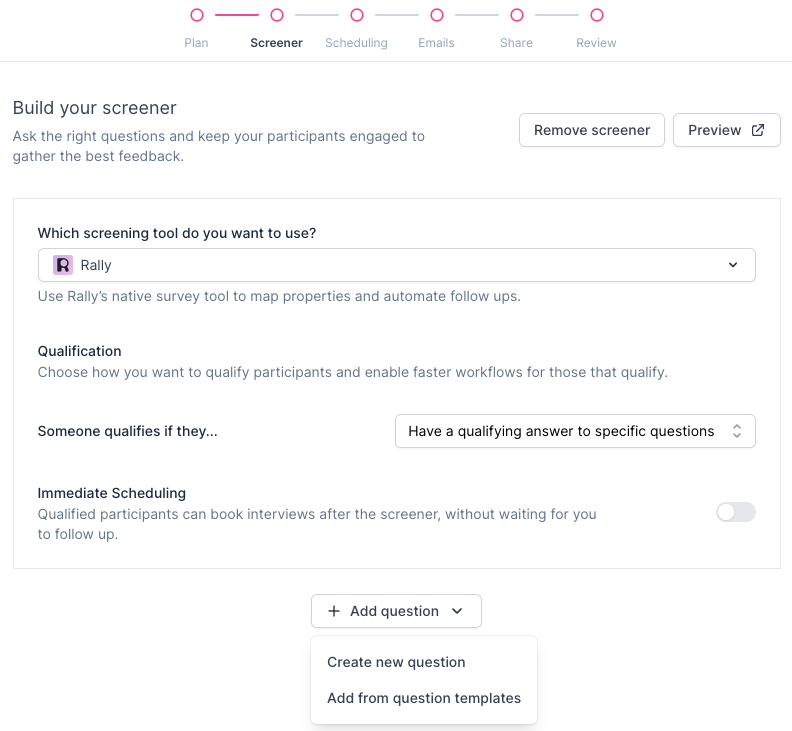
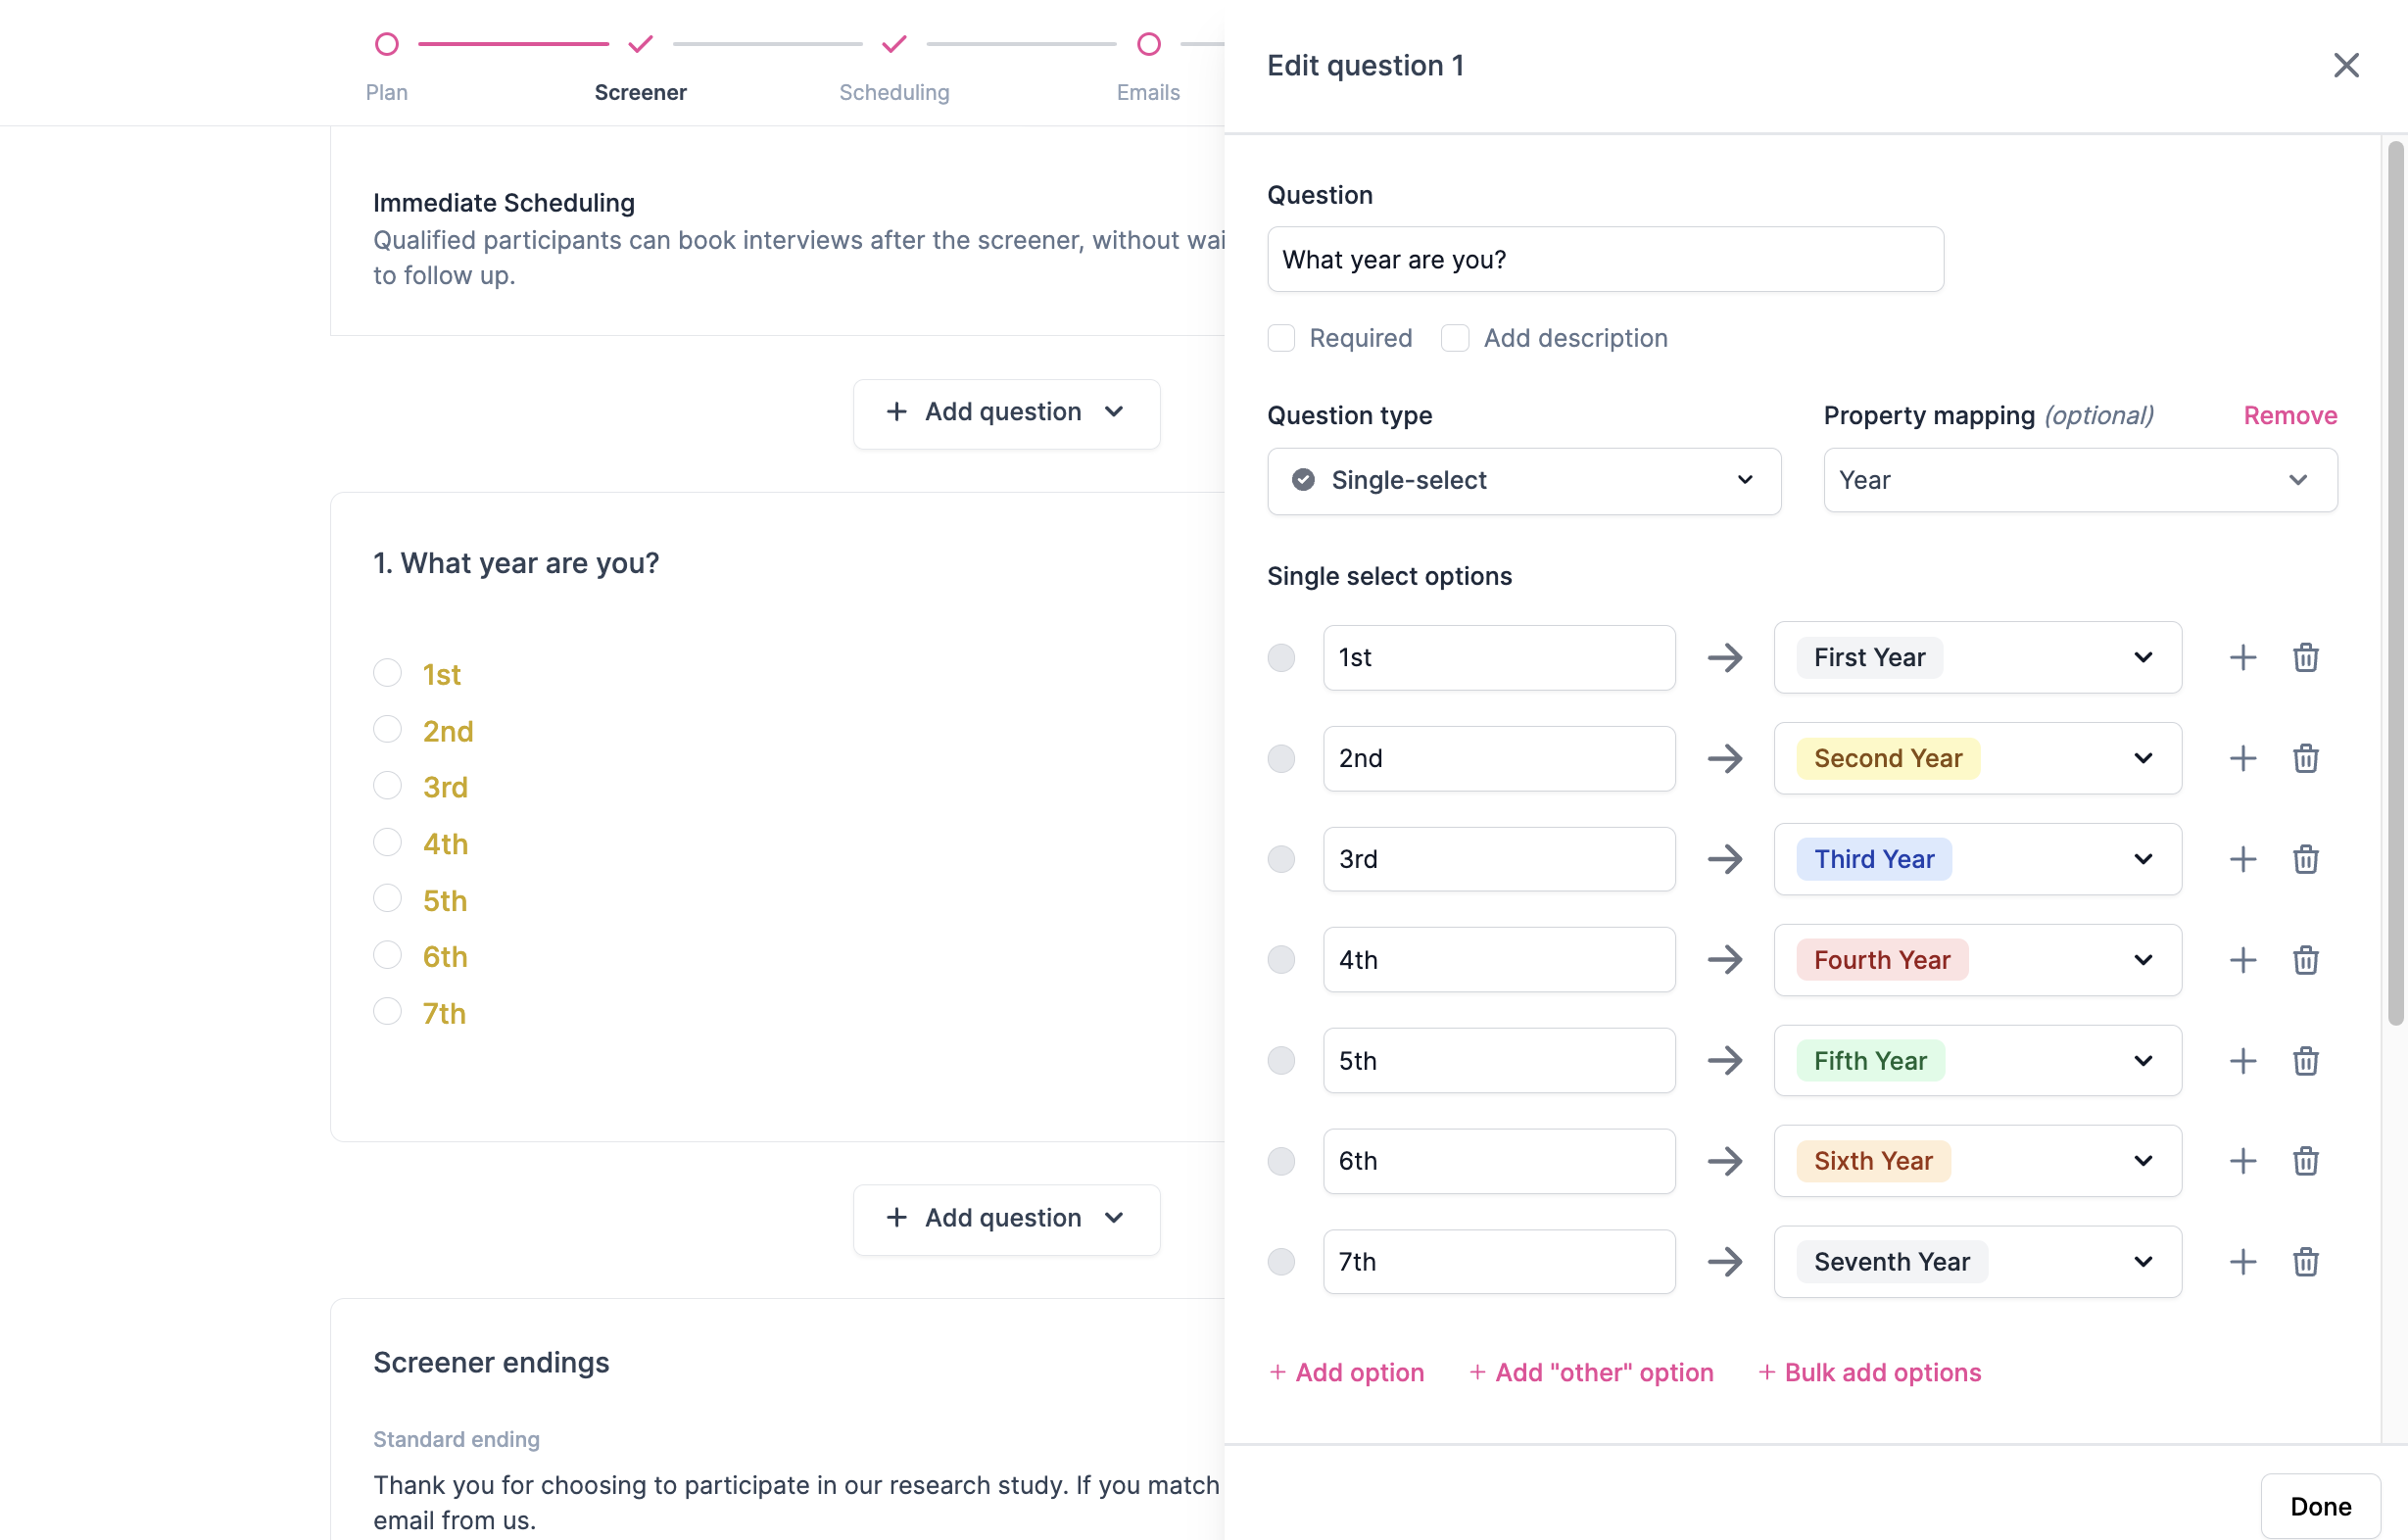
Build Screener: Create your screener by adding questions and implementing conditional logic to tailor the screening process. Select '+ Add Question' and either:
'Create New Question'
Learn how to create new questions, map responses to properties, and optionally save them as new Question Templates as you go.
'Add From Question Templates'
We recommend creating custom Question Templates in advance to allow your team to quickly and easily build quality screeners.
Screener endings: Customize messages for Participants based on their qualification status.
Standard: A general message that Participants see after they submit the screener.
Example: "Thank you for taking the time to fill out the screener survey. If you match our criteria, you will receive an email from us."
Qualified: A message that Participants see after they submit the screener with auto-qualifying answers.
Example: "Thank you for choosing to participate. We think you'd be an awesome fit for our study, and we will reach out to you when there are opportunities for you to participate in."
Disqualified: A message that Participants see after they submit the screener with auto-disqualifying answers.
Example: "Thank you for taking the time to fill out the survey."

💡 Screeners cannot be submitted twice by a Participant for the same Study. This avoids overwriting original responses or any Participants attempting to bypass a disqualification with an additional submission attempt.
Scheduling
Set your calendar event details and manage availability for your team with Rally's robust scheduling tool. Learn more: Configure Interview Scheduling
Emails
Preparing your emails upfront saves you time and keeps your messaging consistent. You can always return to edit them later or edit them when sending. We highly recommend setting up custom Email Templates for your team in advance to save significant time and ensure professional, consistent, approved communication is used in all email outreach. Email Templates can be selected when reviewing and editing messages during the Email setup step.
Core Messages:
Interview Screener: Send an invitation to potential Participants to participate in your Study by taking the screener. Not included for Studies without screeners.
Interview Scheduler: Invite Participants to book an interview using the Study scheduler. This email bypasses the screener (if one is included) and allows the Participant to schedule time.
Interview Request Reschedule: Ask Participants to reschedule an interview by returning to the scheduler.
Incentive: Thank Participants for taking part in the Study and send them an incentive via Tremendous. Confirm the incentive amount before saving. Not included for Studies without incentives enabled.
Automated Messages:
Interview Confirmation: Automatically confirm the interview details to the Participant after successful scheduling. Includes links to cancel, reschedule, or confirm their interview.
Interview Reminder: Send one or more reminder emails to Participants before their interview. Includes links to cancel or reschedule. By default, new studies include two reminders: one at 24 hours before and one at 3 hours before the interview.
To add a reminder, select + Add reminder and set the send time.
To remove a reminder, select the delete icon next to any reminder.
Interview Cancellation: Inform Participants if their interview was canceled.
For multi-session studies, confirmation, reminder, and cancellation emails are sent per session. Each booking triggers its own set of automated messages.
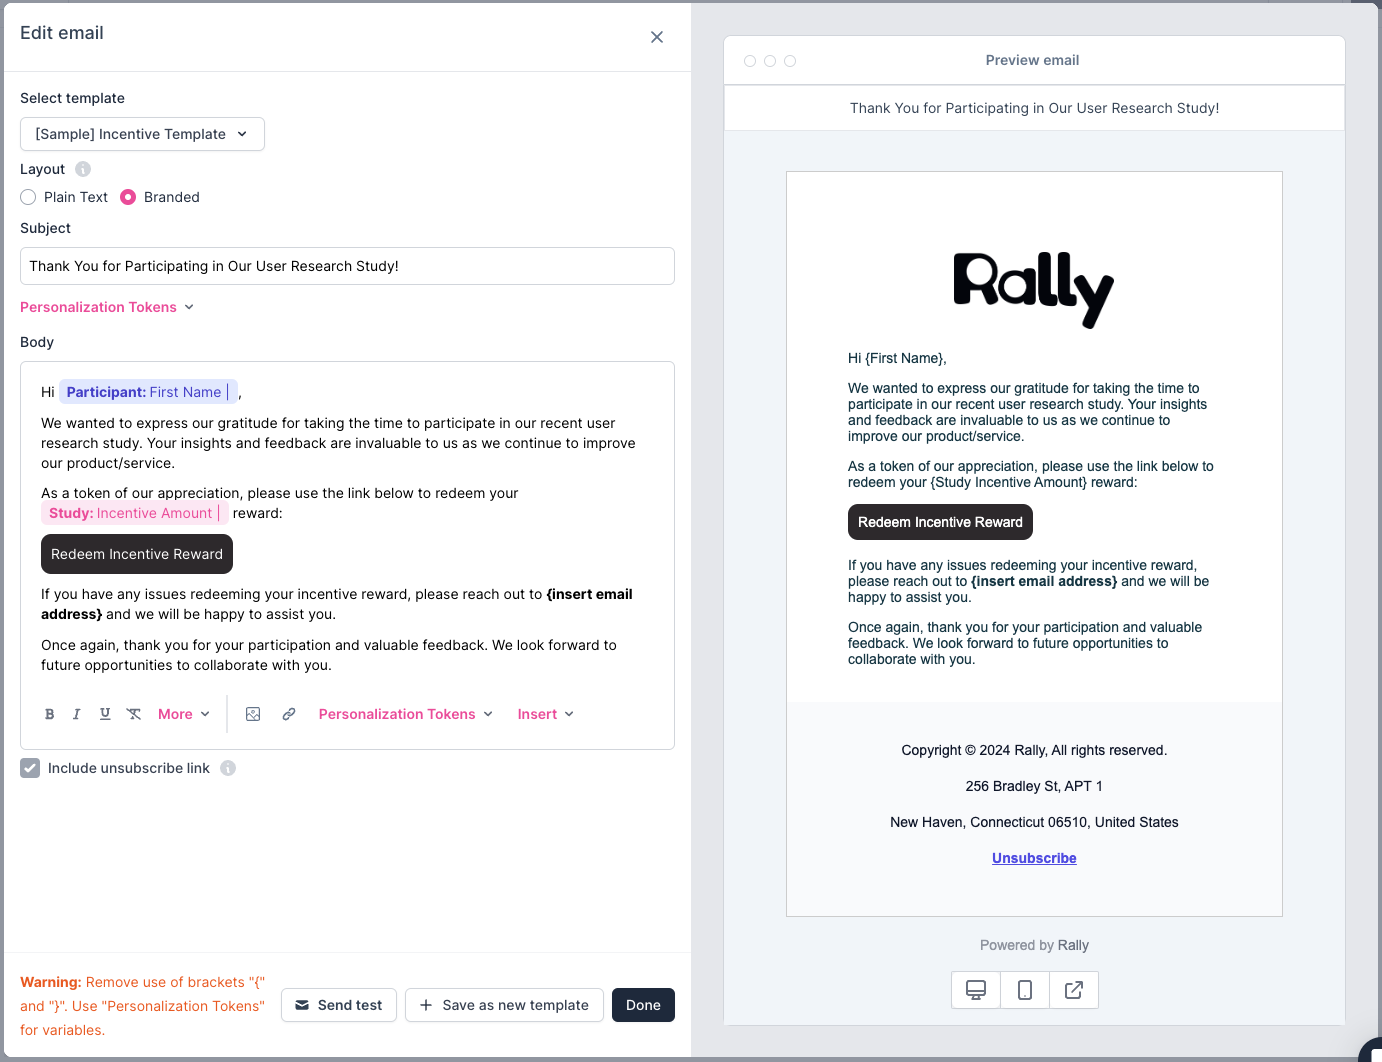
Edit and Preview Outreach Emails
Select the pencil icon next to each email to customize and carefully preview each one.
💡 Visit Email Templates for complete steps and additional important information.
Select Template: Select from pre-made Email Templates for consistency.
Layout: Select Plain Text or choose Branded for more professional outreach.
Subject: Edit the email subject as needed. Optionally, include Personalization Tokens to auto-populate such as Participant's First Names.
Body: Edit the email body as needed (less relevant for Email Templates). Optionally, further customize formatting and add Personalization Tokens to auto-include relevant information, such as Study Name or Incentive Amount.
Include Unsubscribe Link: Include a link at the bottom of your emails allowing recipients to stay unsubscribed. It will help you stay compliant with local spam laws and improve deliverability. Unsubscribe links are required for branded emails.
Send Test: Optionally, send yourself a test email.
+ Save As New Template: Save any new email you create as an Email Template for later reuse.
Done: Select Done to close the editor.
Learn how to decrease spam rate and improve email deliverability before emailing customers.
Adding a confirm attendance link
You can add a confirm attendance link to any Interview Reminder or Interview Confirmation email to let Participants verify they're still planning to attend. When a Participant confirms, a double blue checkmark appears on their interview card in the Interviews view and in the activity feed.
To add a confirm attendance link to an email:
Select the pencil icon next to the reminder or confirmation email to open the editor.
Select Insert and choose Insert confirm attendance link.
Customize the link text or style it as a button as needed and select Save.
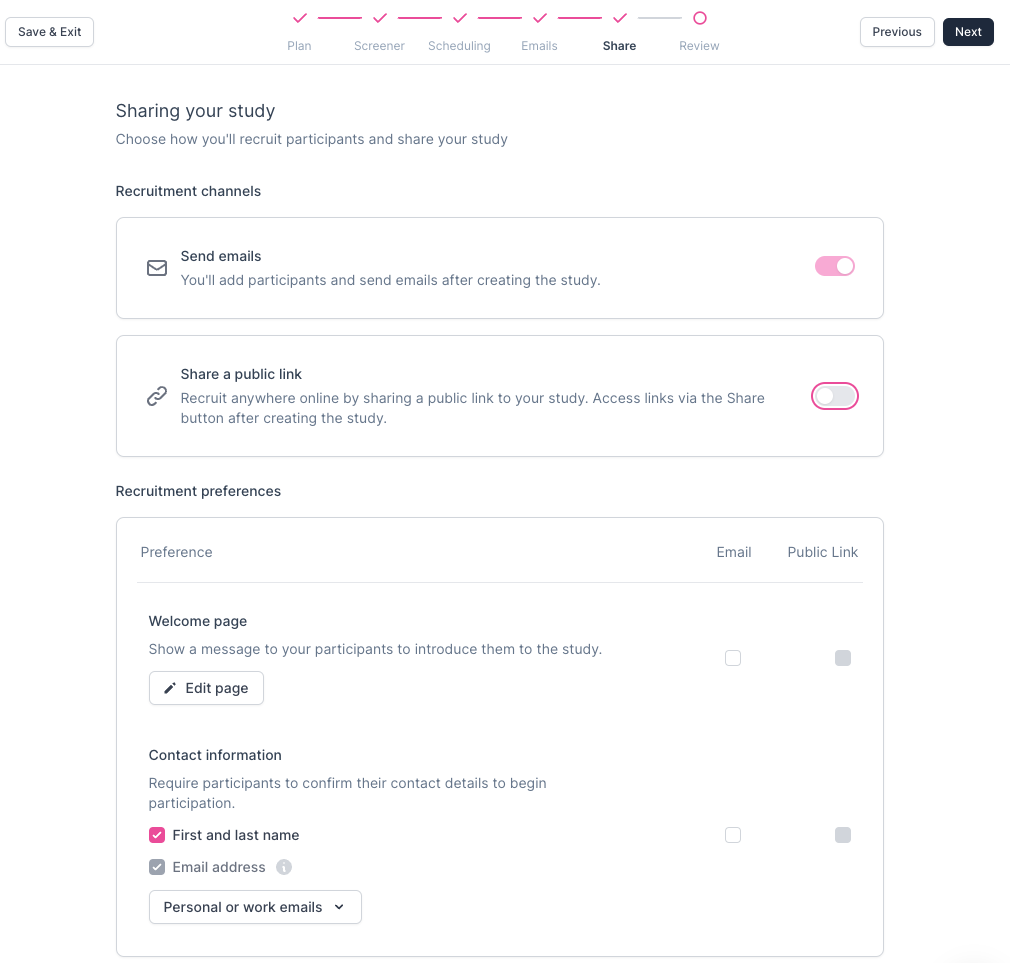
Share
Choose how you'll recruit Participants and share your Study.
Select Recruitment Channels:
Send Emails: Emails are always enabled.
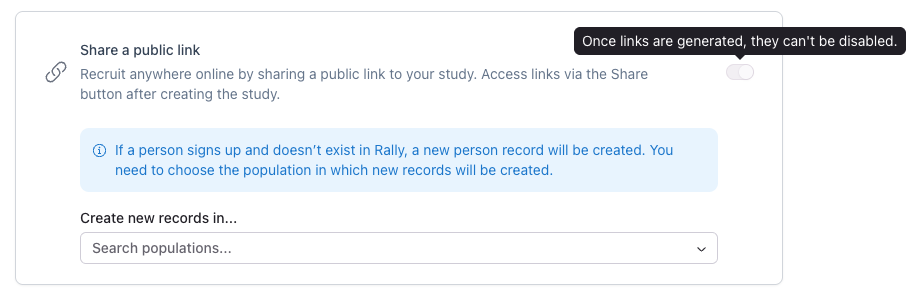
Share a Public Link: Optionally toggle on if you’d like to invite or recruit anywhere online by sharing a public link to your study. Select the population where new people that signup via public share link will be added.
Once links are generated and the study is published or updated, they cannot be disabled.
Recruitment Preferences:
Welcome Page: Create a custom Welcome Page for Participants by selecting 'Edit Page'. Check the corresponding boxes to decide whether the welcome page will be shown to Participants invited via Email or Share Link, or neither.
Contact Information: Confirm which information will be required from Participants when they sign up.
First Name & Last Name: This setting is enabled by default and requires a person to enter their first name & last name to join this Study. Optionally, disable this setting for Participants invited via Email.
Email Address: This setting is enabled by default as an email address is required to join a Study. Decide whether to allow 'Personal or work emails' or 'Work emails only'. This defaults to 'Personal or work emails'.
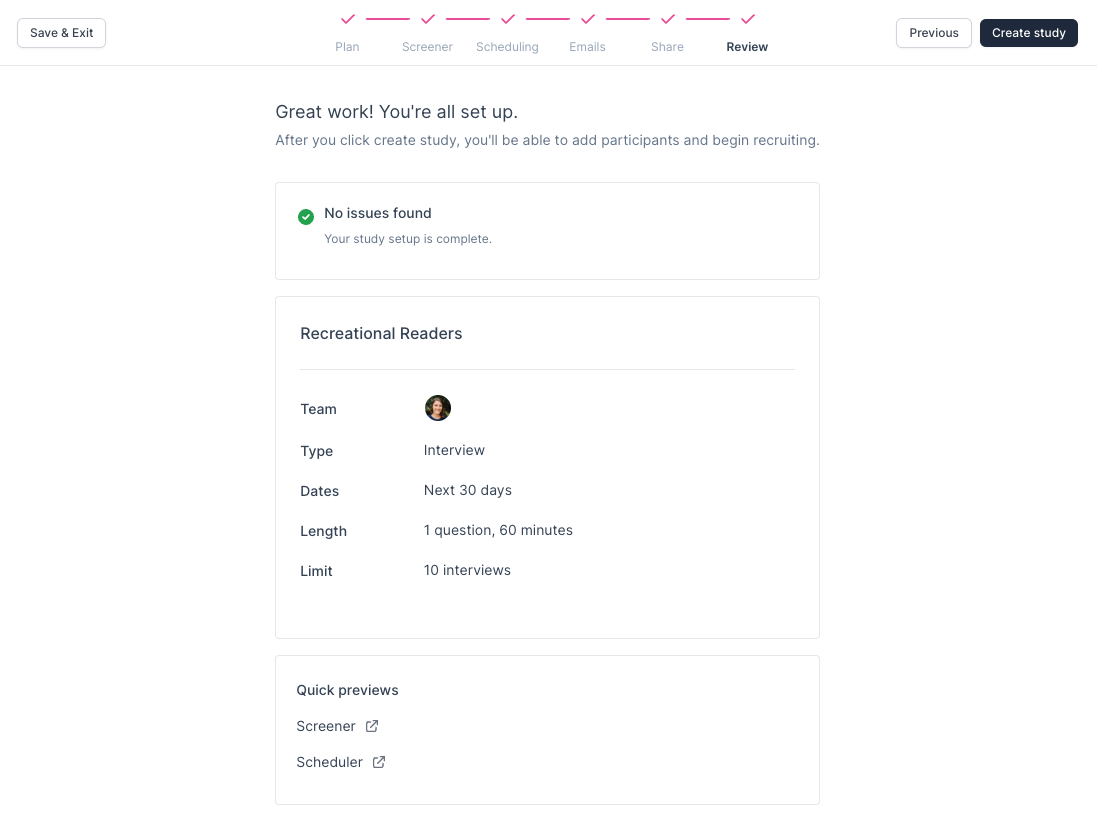
Review
Confirm everything is correct or add any missing info to ensure your Study is complete.
Review the components of your Study: Rally will check for any known errors or missing details in your Study setup for you to make necessary edits. Preview your entire Study from the Participant's perspective to ensure a seamless experience.
Select 'Create Study' in the top right to launch the Study and get started!
If you're not ready to Publish it, select 'Save & Exit' to save it in a Draft state to return later.
Next, add Participants to your Study before sending email invitations or sharing links.
Visit our guide to learn more about how to prepare key components in advance before creating Studies, and learn the next steps for conducting each Study type after creation.