Users, Roles, and Permissions
Last updated: October 22, 2026
Rally default roles
Rally comes with 6 default roles. Each role has a seat type assigned to it: Free or Paid. Based on the seat type of roles, certain permissions are enabled/disabled, with certain permissions requiring a Paid seat.
Rally's default roles can't be edited, but Admins can create custom roles to set granular permissions for different types of users. Ops Managers can view roles but can't create, duplicate, or delete them.
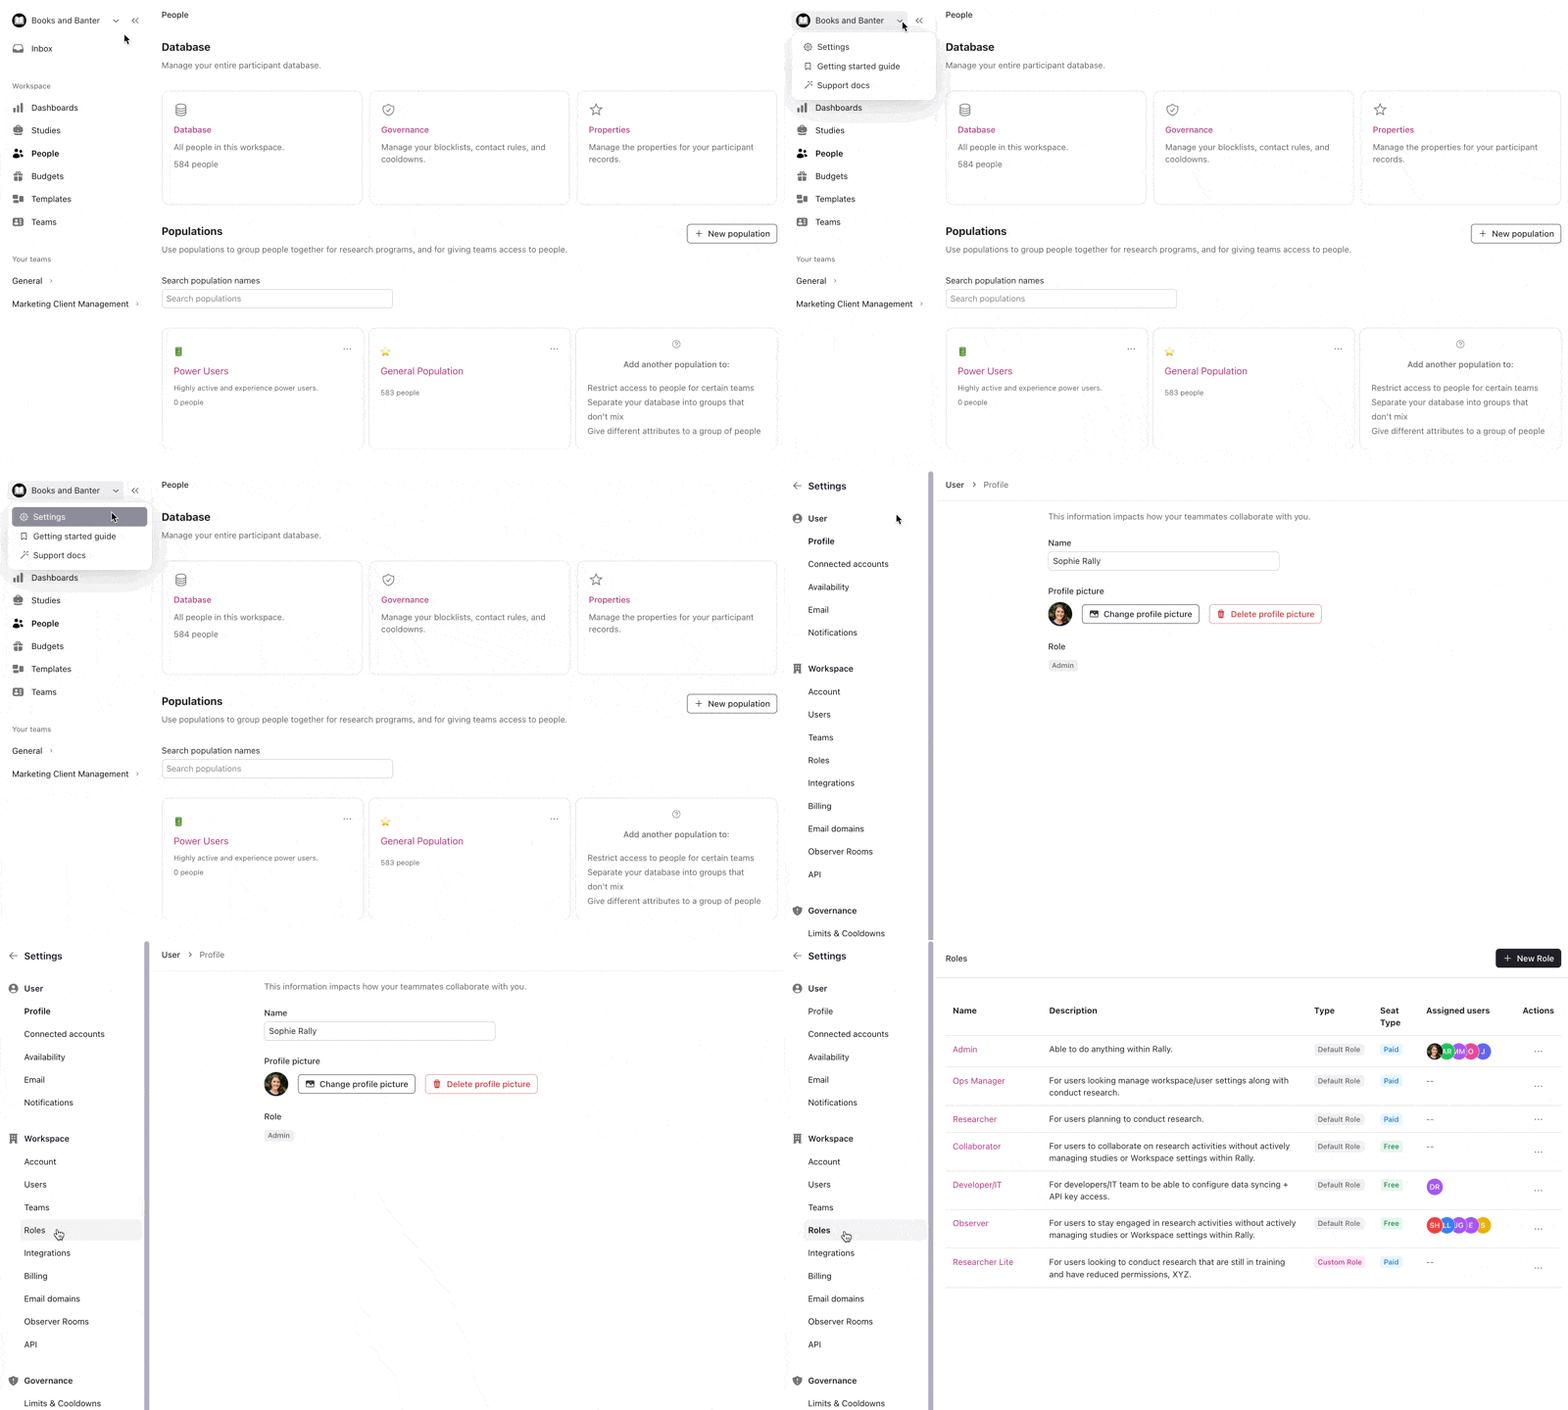
Admins & Ops Managers can explore all permissions scopes in Settings > Roles.
Default Role | Description | Seat Type |
Admin | Able to do anything within Rally, modify all workspace settings, modify studies they don't own, and more. | Paid |
Ops Manager | For users looking to manage workspace/user settings along with conducting research. | Paid |
Researcher | For users planning to conduct research. | Paid |
Collaborator | For users to collaborate on research activities without actively managing studies or workspace settings within Rally. | Free |
Developer/IT | For developers/IT team to configure data syncing, API key access, connect domains and integrations, etc. | Free |
Observer | For users to stay engaged in research activities without actively managing studies or workspace settings within Rally. | Free |
Paid vs free seat types
Paid seats are for team members who need to create, manage, and launch studies. These users can do things like set up screeners, send email invitations, manage quotas, and own the end-to-end study process.
Free seats, or what we call collaborators or observers, still have a lot of access included - they can view studies, host interviews, mark attendance and so on. Free seats are also unlimited.
Learn how to invite your colleagues to Rally, and manage users to view and edit existing users, resend invites, deactivate or delete, and more.
Create and assign custom roles
Creating and managing custom roles requires the "Create and modify role settings" permission. This includes the Rally default roles Admin and Ops Manager.
Create custom roles to set granular permissions for different types of users, giving you full control over research and access within Rally. The easiest way is to duplicate a default role with the closest permissions match and customize it from there though you can also build one from scratch, selecting each permission individually.
Select your workspace name to select Settings.
Select Roles.
Create a custom role from a default role
Workspaces can have up to 10 custom roles. Contact Rally Support if you need more.
Decide which default role to use as your template.
Select the three dots (...) to the right and Duplicate.
The duplicate is named Copy of [role name] and keeps the original role's seat type and permissions.
Select the name of the new custom role to open and begin editing.
Name: Add a name for this role (i.e. Researcher Lite, Designer, or Research Lead).
Description: Describe what types of users this role is for, and any special permissions allowed or disallowed.
Below the description, there are tabs to switch between Permissions and Users.
Permissions: From the Permissions tab, review and toggle each granular permission on or off to set this role's access. Granular permissions are grouped by category.
Select Save Changes in the top right corner.
Create a custom role from scratch
Select + New Role.
Name: Add a name for this role (i.e. Researcher Lite, Designer, or Research Lead).
Description: Describe what types of users this role is for, and any specific permissions allowed or disallowed.
Below the description, there are tabs to switch between Permissions and Users.
Permissions: From the Permissions tab, review and turn each granular permission on or off to set this role's access by selecting the checkboxes next to each one. Granular permissions are grouped into categories.
Select Save Changes in the top right corner.
Add or remove users from roles
Select your workspace name to select Settings.
Select Roles.
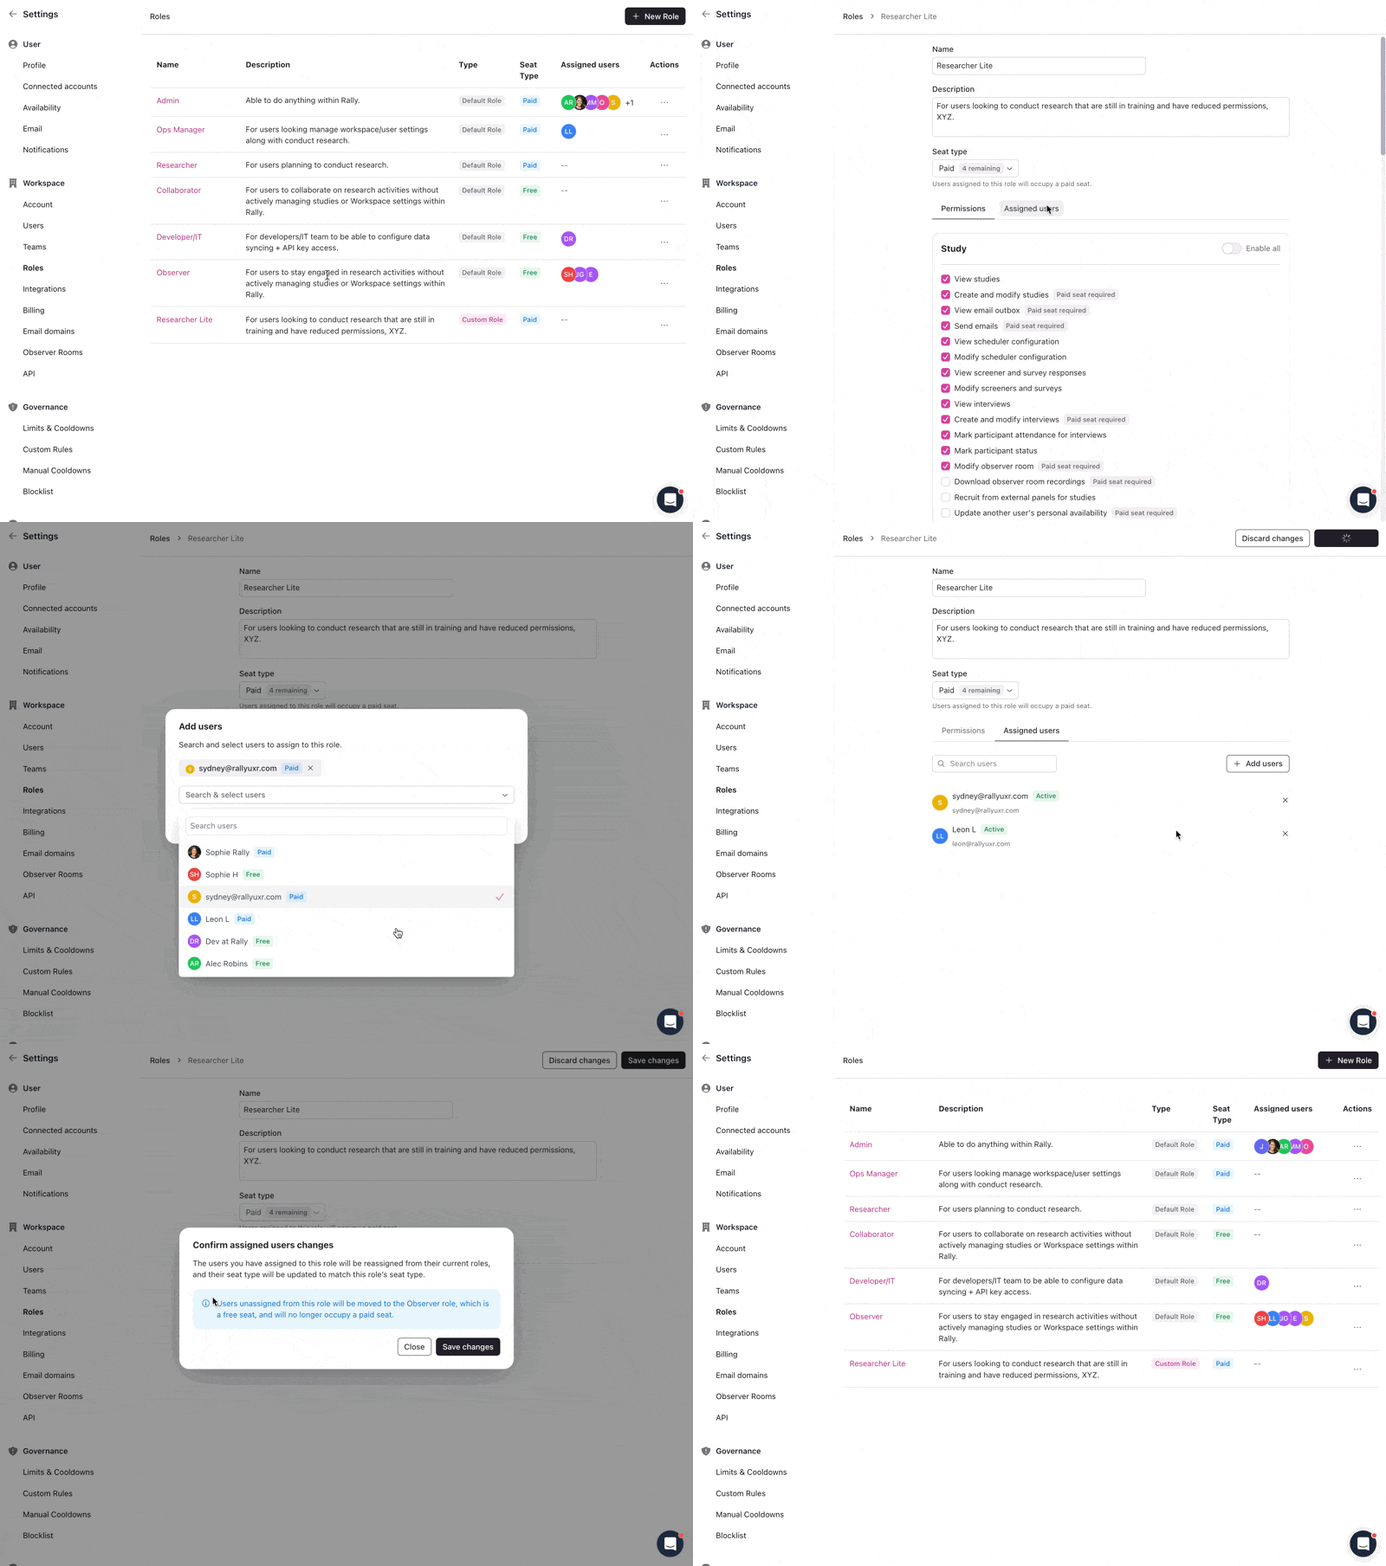
Select the name of the role to open.
Select the Users tab to see members of this role.
Add members:
Select the + Add members button.
Select the User dropdown to search and select existing teammates.
Add multiple users to a role at once by selecting more names.
Select Add Users to confirm.
Remove members: select the trash icon to the right of a user to remove them from the role.
Users unassigned from a role without a new role assigned will be moved to the Observer role, which is a free seat, and will no longer occupy a paid seat.
Select Save Changes in the top right corner.
For context on how new users get assigned a role automatically, see Workspace Account Settings. If domain auto-join is enabled, new users get the workspace's default join role. This is Observer unless an admin picks a different free-seat role in Workspace Account Settings.
Granular permissions for users
Granular permissions are grouped into the following categories, including each permission available to set for custom roles:
Study
People & Properties
Templates
Workspace
Teams & Users
Incentives & Budgets
Governance
Integrations
Reporting
Toggle each permission on or off using the checkboxes, or use the Enable all / Disable all toggle to quickly update every permission within a category at once.
Permissions marked Paid seat required will use a paid seat if enabled and assigned to a user.
Review each default role's associated permissions in Settings > Roles to confirm the right access level per user. You can also view a role's permissions when you add a new user or edit a user.
Delete a custom role
Deleting a custom role can only be done when no users are assigned to the role. Reassign any users to a different role before attempting to delete.
Select your workspace name to select Settings.
Select Roles.
For the role to be deleted, see who is listed in the assigned users column and hover over each profile photo to see their name. Any assigned users must be updated to new roles before a custom role can be deleted.
Select the three dots (...) on the right of any custom role and select Delete.
Select Delete Role to confirm.