Study Quotas
Last updated: February 27, 2026
What are Study Quotas?
Study quotas help you organize participants into distinct segments (like "Free Plan," "Enterprise Plan," or "Business Plan") and set recruitment limits for each quota within a single study. Instead of creating multiple studies to manage different user types, participant quotas keep everything organized in one place. Quotas are optional.
How It Works
Enable and set up participant quotas in the study builder.
Auto-assign participants to a quota based on screener responses using conditional logic, or manually assign participants to a quota.
Track progress and completion across quotas from study overview.
Set Up Quotas
Enable participant quota limits in study setup before (or after) publishing a study. Quotas are optional and are set per study.
In the Plan section of study setup, configure your participation limit:
A specific number of people
Unlimited
Turn on Participant quota to define and set limits for different participant groups for this study.
Select + Add quota.
At least 1 quota is required when enabled, up to 6 total.
Name each quota and set the max limit.
Max limit = the # of completed activities allowed within a quota before the participation limit is met (e.g., completed interviews, tests, or surveys).
A quota with max limit = 6 in an interview study will allow 6 completed interviews for participants assigned to the quota before disabling access to the scheduling calendar with a fully booked message.
If you set a participation limit for the study, instead of unlimited, the total sum of all quota max limits must be less than or equal to the overall participation limit.
Decide if you want to Auto-close quota when full (optional):
Quota groups will close automatically when their max limit is met for combined total of scheduled and completed activities. Participants may still be assigned to a quota, but won't be able to schedule an interview. Instead, they'll see a 'study closed' message.
If your study has an overall participation limit, participants will not be able to complete the activity if their assigned quota's max limit is met or the study's overall participation limit is met, and will instead see a fully booked message.
Optional: Auto-assign participants to quotas based on screener responses by setting up conditional logic on screener questions using the steps below.
Optional: You can also set up qualification logic to auto-qualify or -disqualify participants based on responses, and choose whether to allow immediate scheduling or testing after screener.
Finish setting up the rest of your study and publish it.
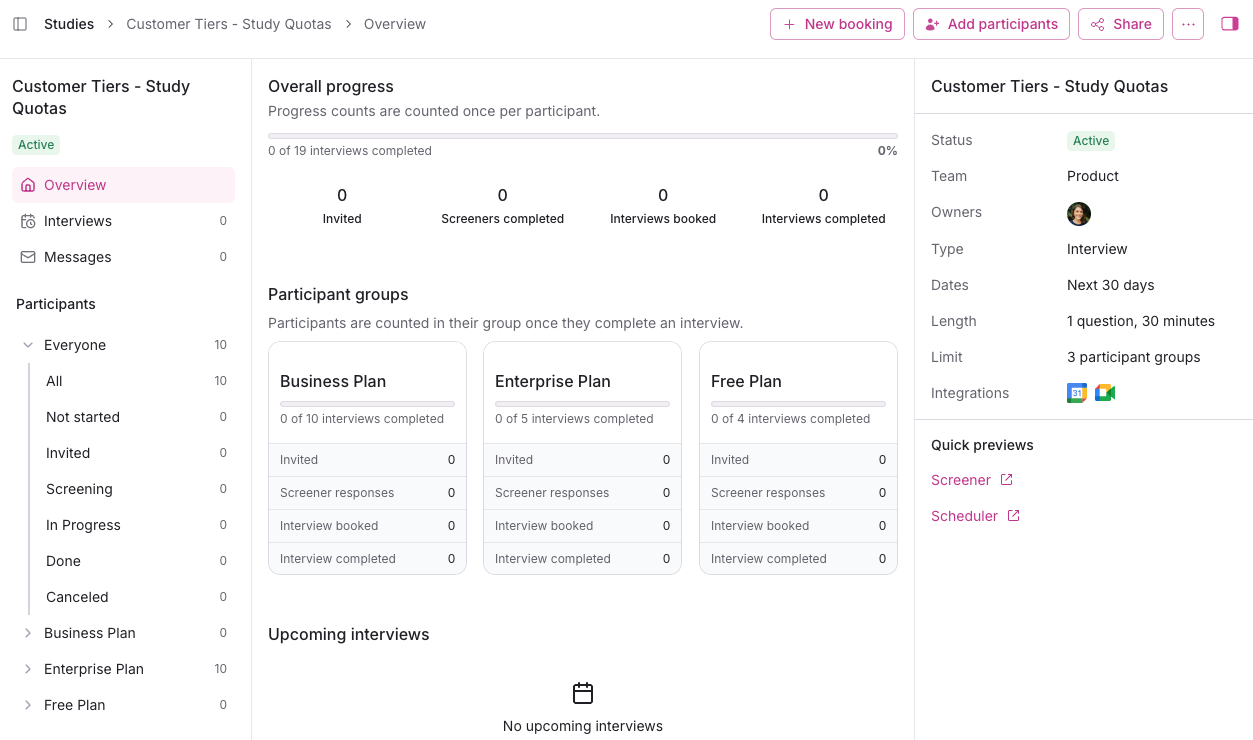
After publishing, in the left nav menu you'll see new dedicated participant quota pages to manage each different quota. Select a participant quota name to expand.

Auto-Assign Quotas Based on Screener Response
Set up conditional logic on screener questions to automatically assign participants to study quotas based on their screener responses.
In the Screener step of study setup, select question(s) that will determine which quota group participants should be auto-assigned to.
Enable Conditional Logic in the screener question.
Select + Add condition and set the condition to Assign to quota based on specific response(s) and select the quota to assign.
Repeat these steps for each quota and each relevant question and response.

When participants respond with a quota response, they'll be automatically assigned to the relevant quota.
Note: Participants can only be assigned to up to 1 quota in each study currently.
Manually Assign Participants to Quotas
Manually assign participants to quotas when you are adding participants to your study, or use table actions to assign them later, individually or in bulk.
Participants can only be assigned to up to 1 quota within a given study, but are not required to be assigned to a quota.
From Adding Participants
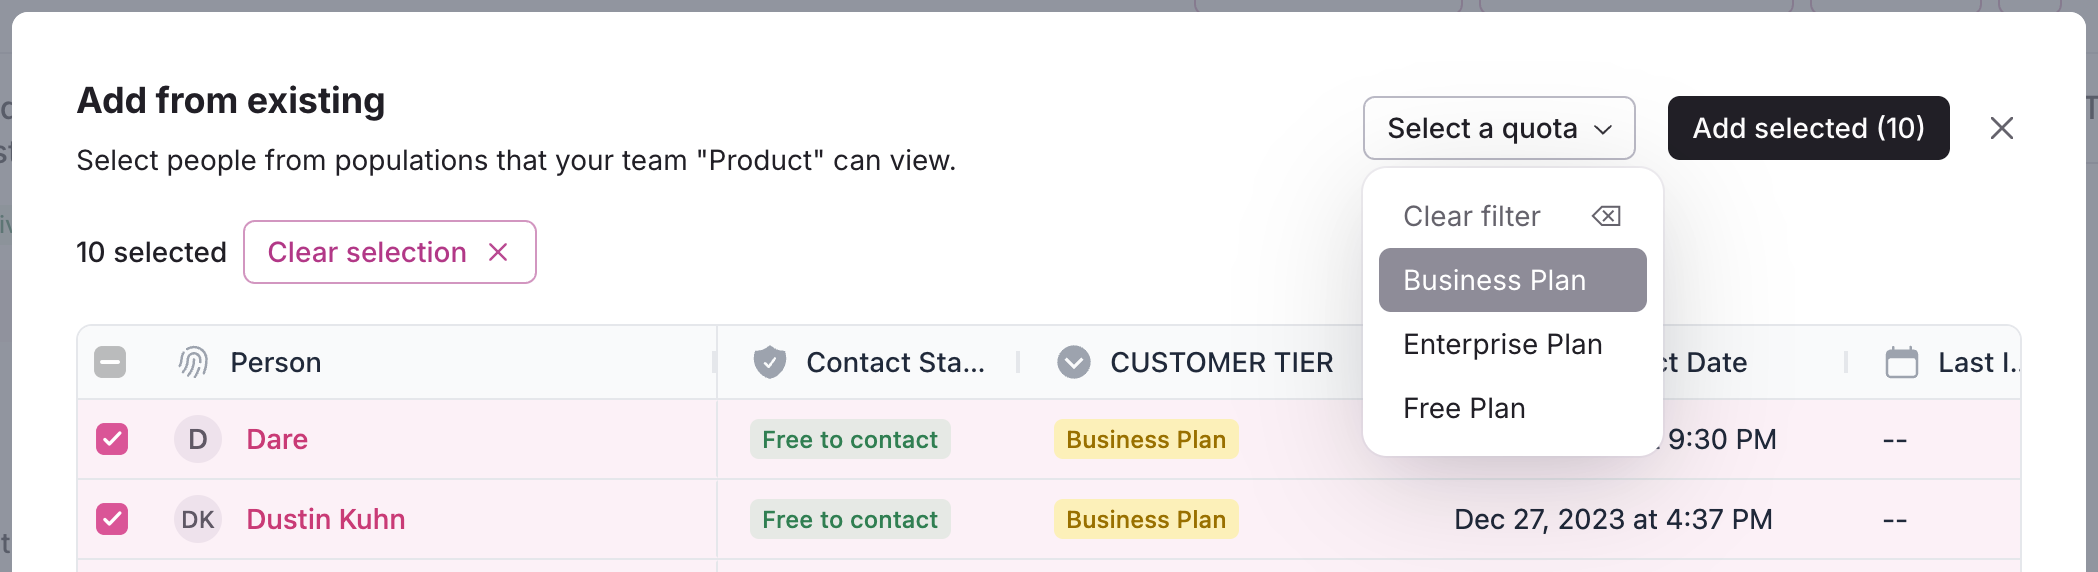
From the study overview, select + Add participants and then Add from existing.
Select participants by checking the checkboxes next to their names.
Tip: Use filters to refine your search with any custom properties or Rally properties or segments to target the right people. Add columns to view properties per participant.
Quickly select multiple consecutive rows simultaneously by making your first selection and then holding the shift key when making your last selection.
Select a quota to assign these participant to when adding to the study.
Participant quotas must be set up first within study setup.
Select Add selected (#) to confirm.
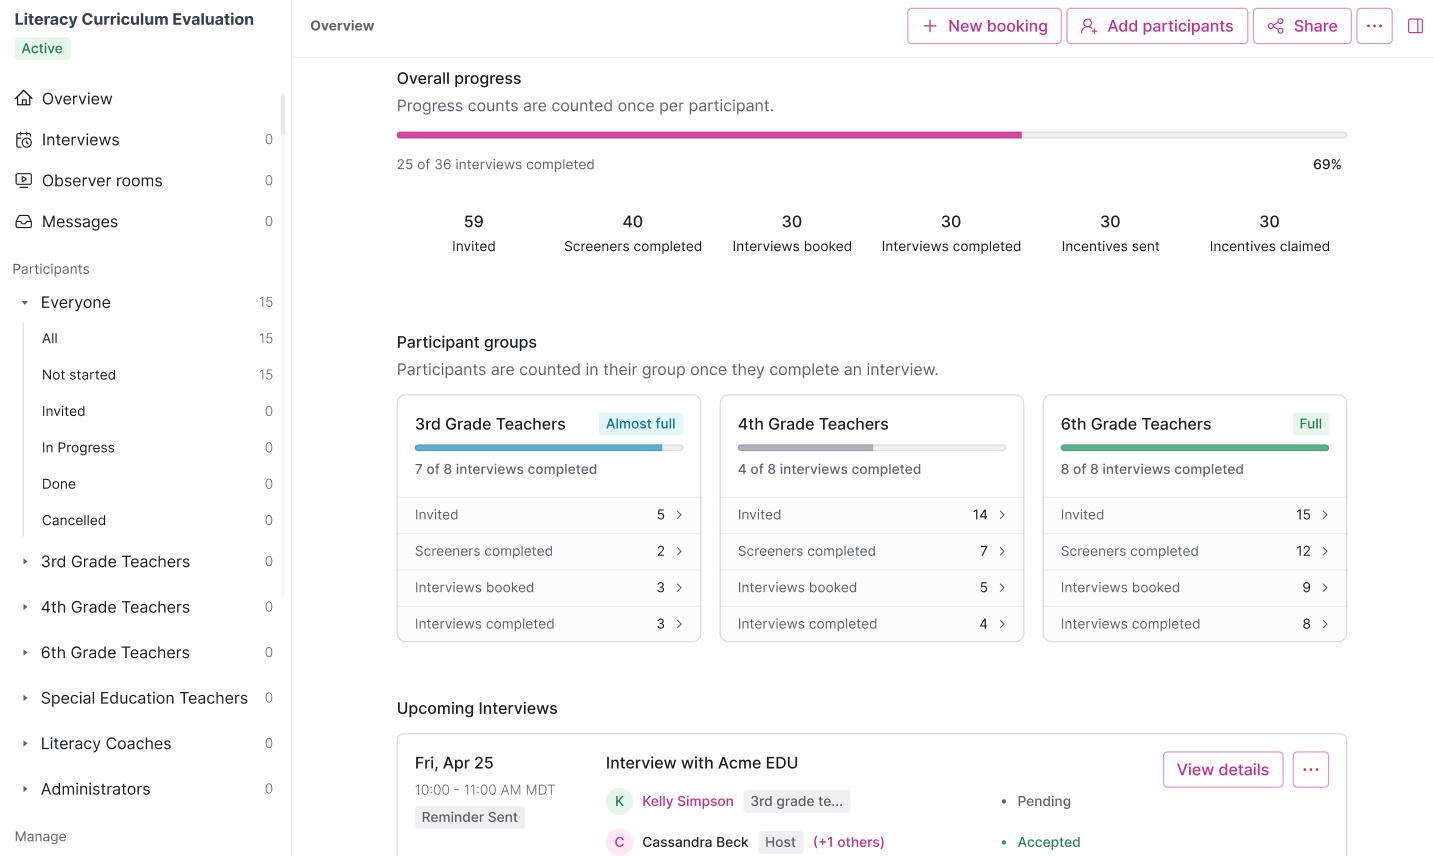
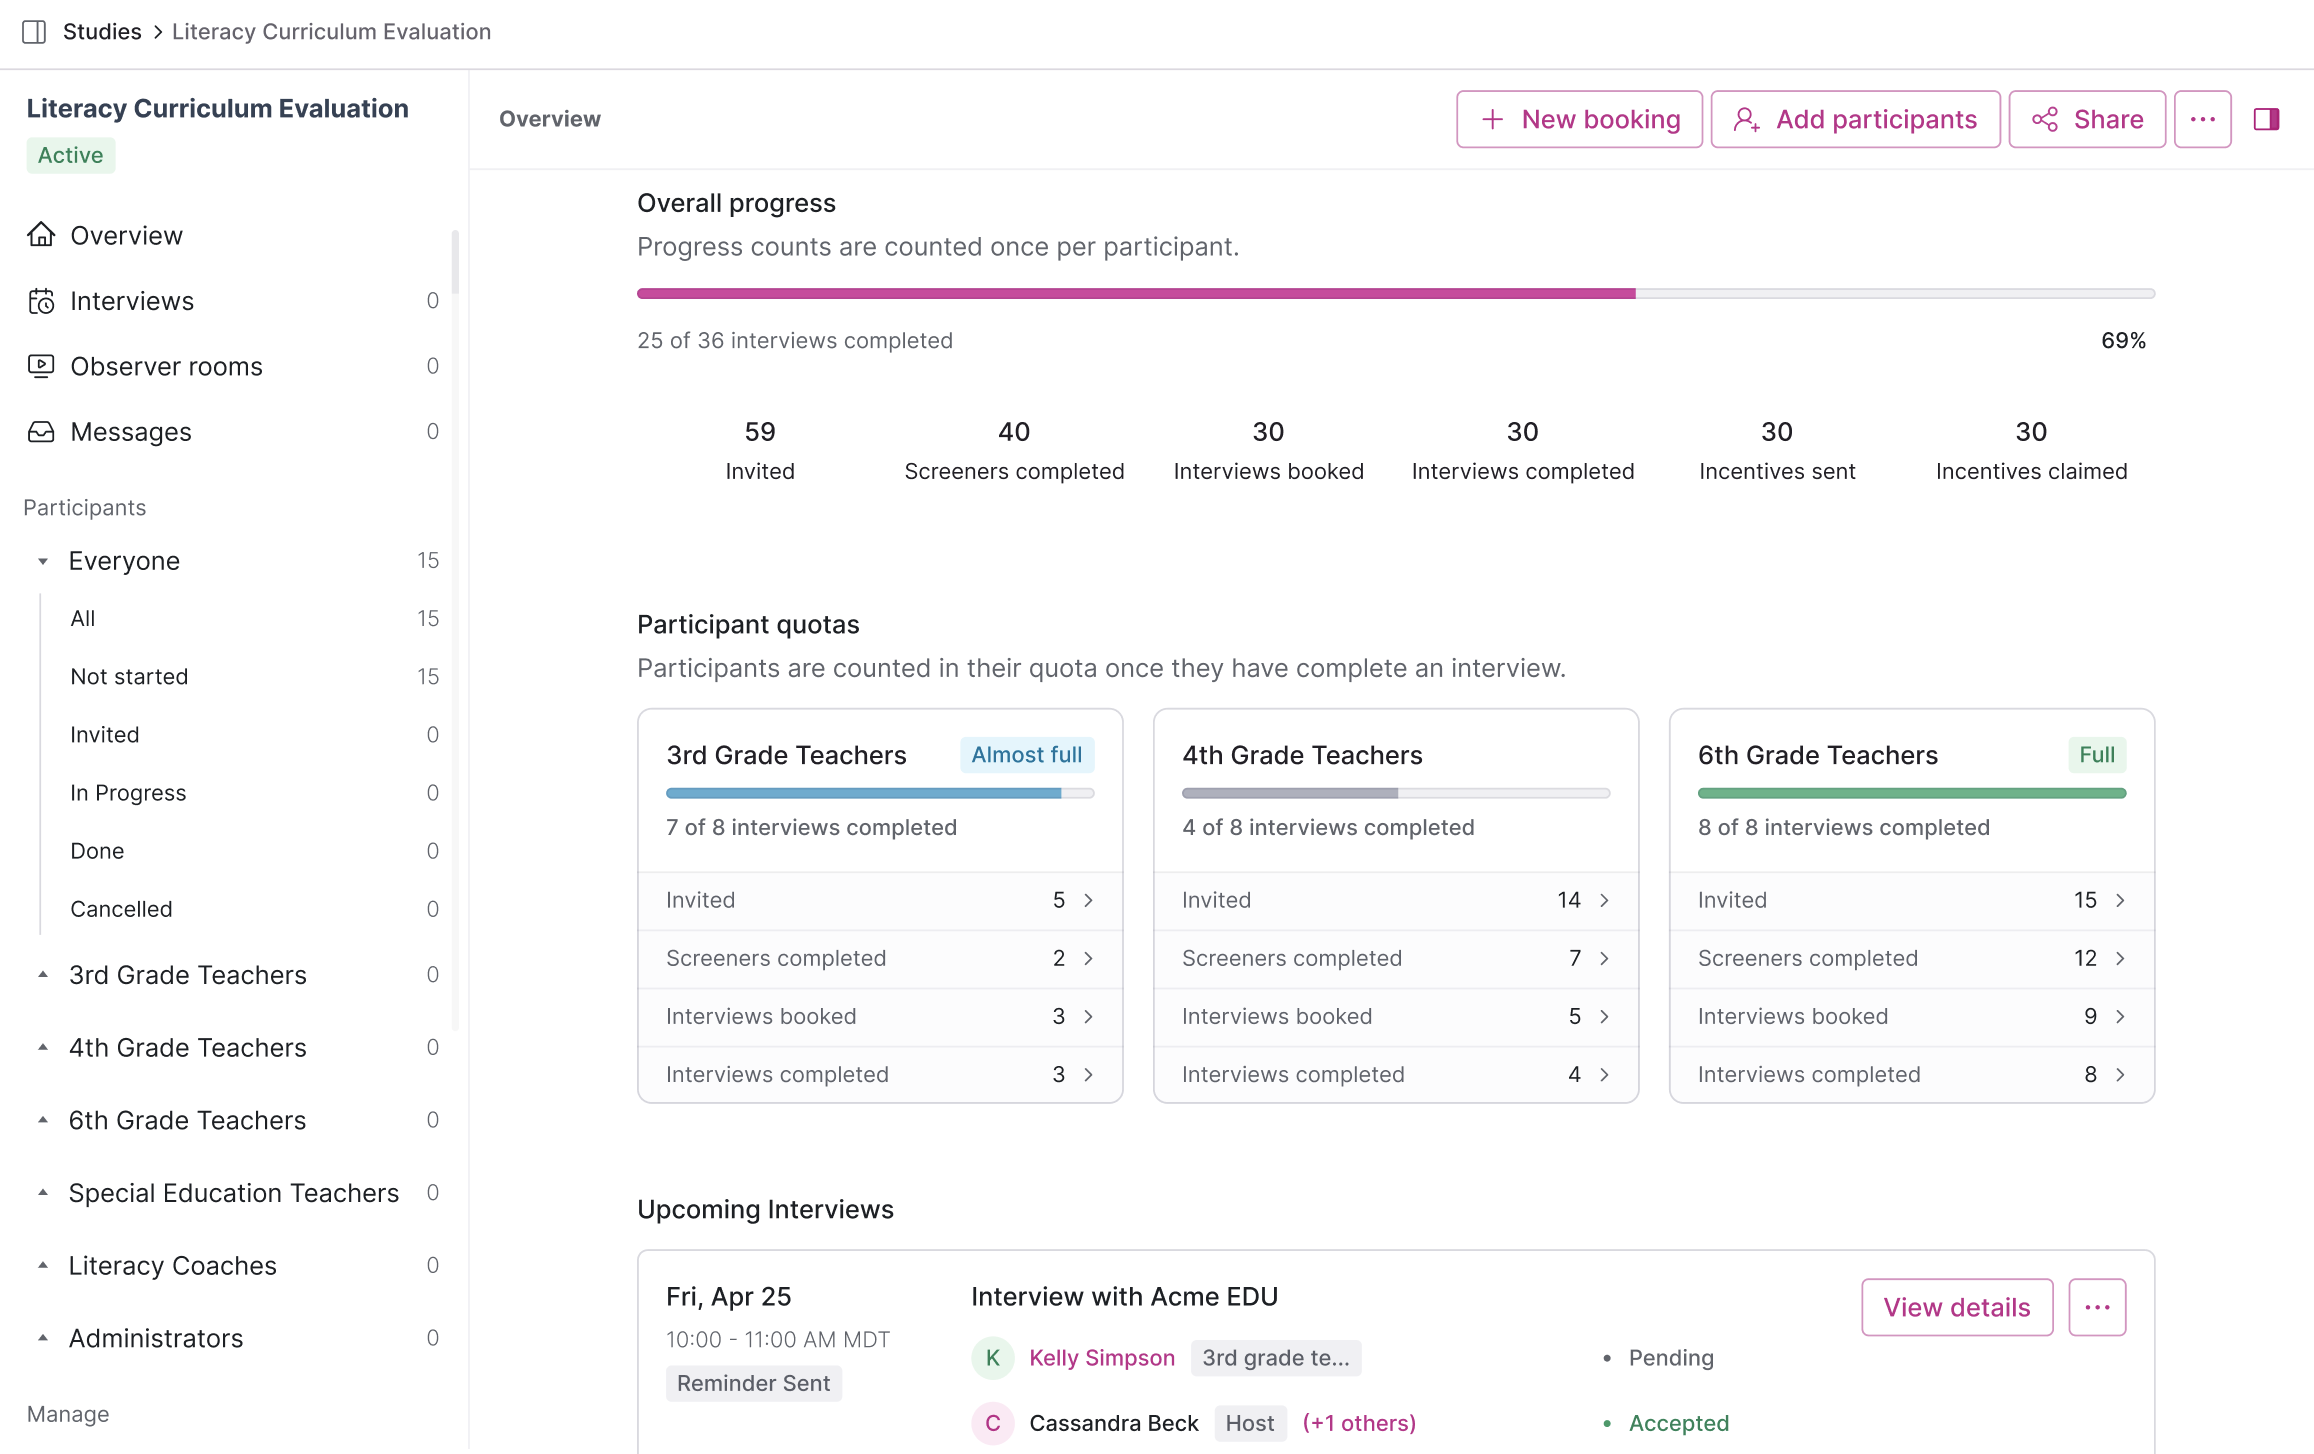
Once participants are added, your study overview page shows a preview of each participant quota with completion and status counts to manage progress.
Select a participant quota from the left nav menu to expand and manage participants by status and send invitations.
From Participants Tables
If you've already added participants to your study, you can follow up to assign each person to a specific quota individually or in bulk using table actions.
Select participants by checking the checkboxes next to their names.
Tip: Use filters to refine your search with any custom properties or Rally properties or segments to target the right people. Add columns to view properties per participant.
Quickly select multiple consecutive rows simultaneously by making your first selection and then holding the shift key when making your last selection.
Select the More actions button at the top of the table.
Select Assign to quota and select a study quota.
Participant quotas must be set up first within study setup.
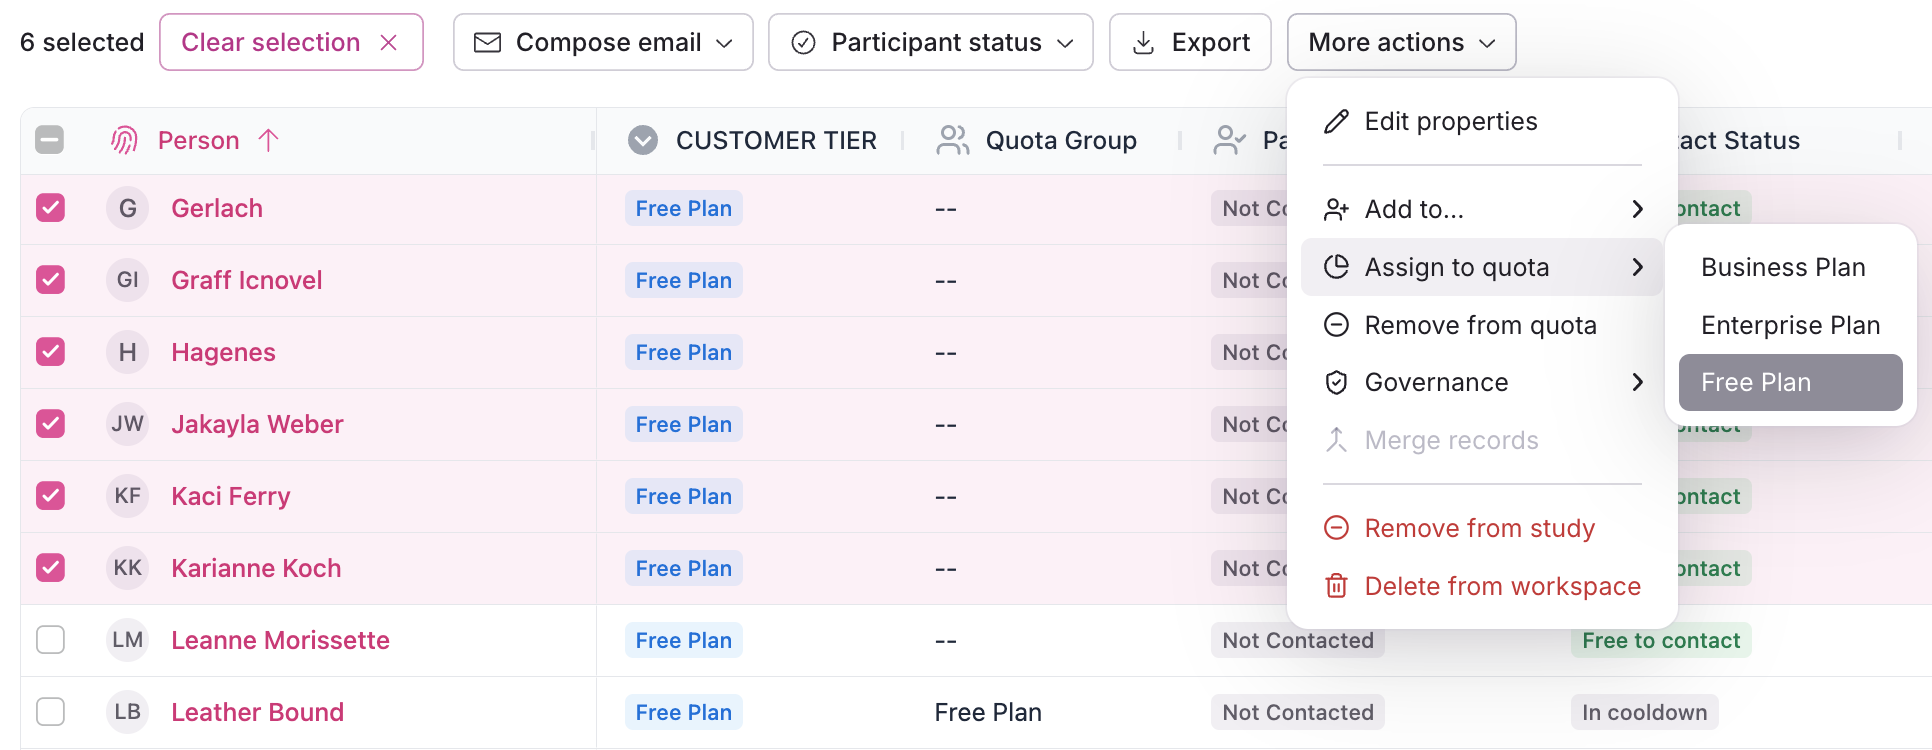
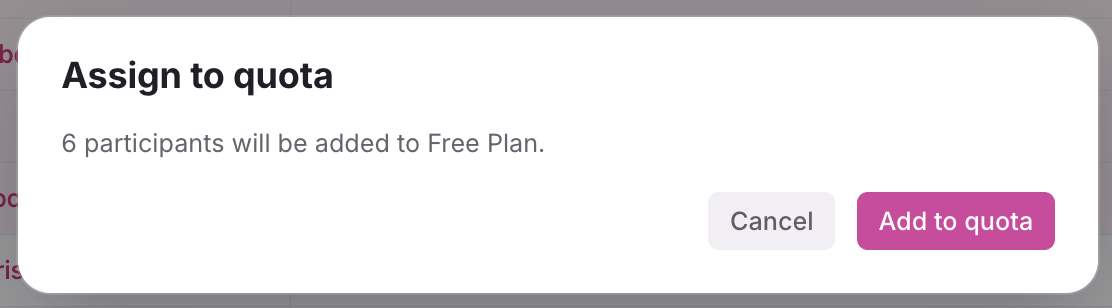
Review the count and quota, then select Add to quota to confirm.
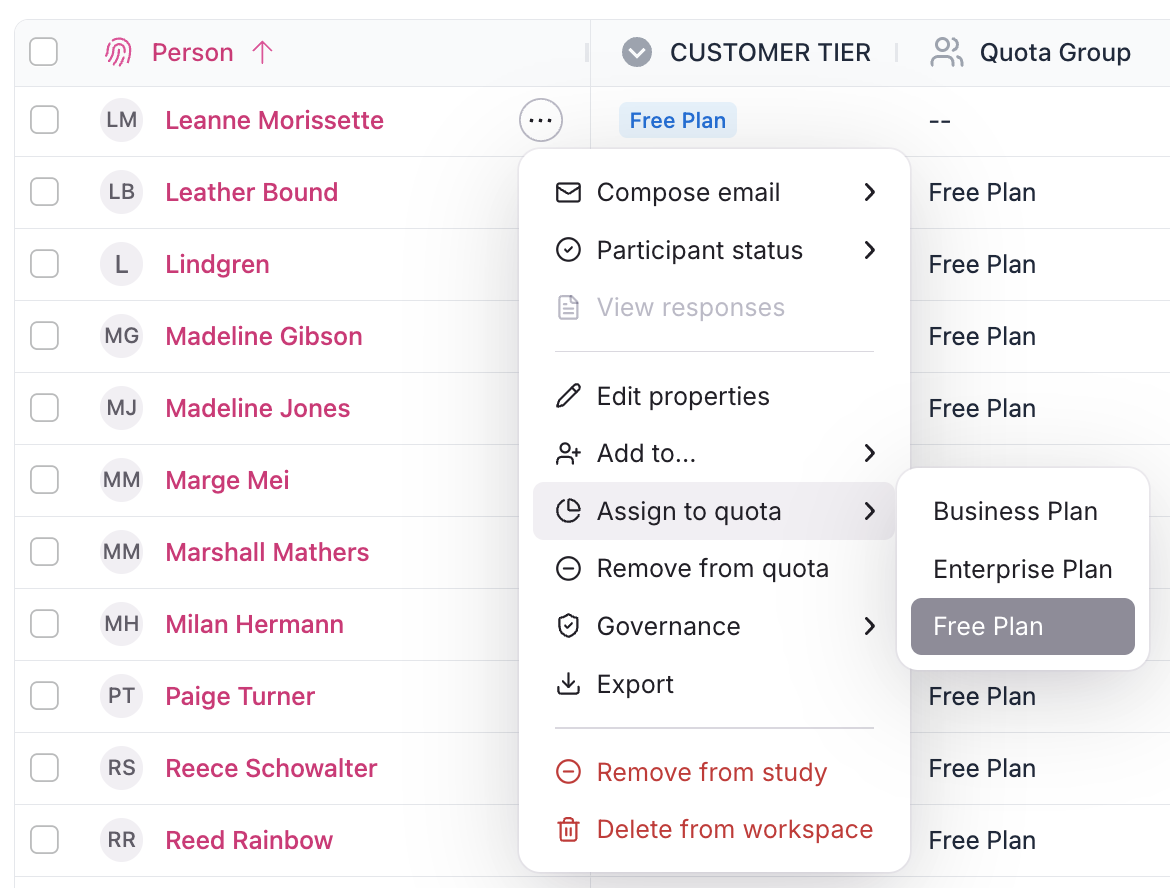
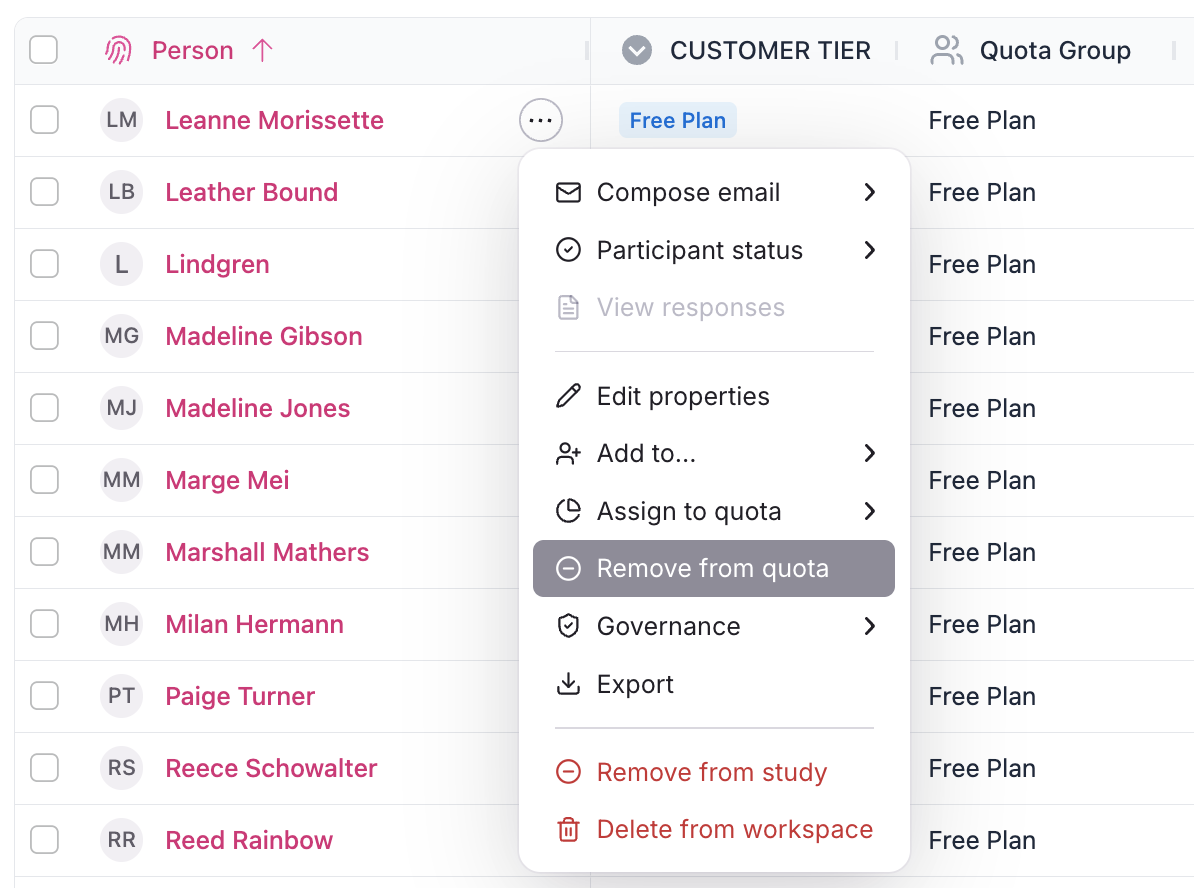
Individually: Assign an individual participant to a quota by selecting the 3 dots ... next to their name to Assign to quota, select a quota and confirm.
Select a participant quota from the left nav menu to expand and manage participants by status and send invitations.
From Populations
If you add participants to an existing study from within a Population or Database, you can optionally select a quota to assign them to if the study has quotas enabled.
In a population or database, select participants and Add to... > Add to study.
Select a population. If study quotas are set up on the study, you can choose a quota to assign them to now if you'd like.
Select Add people to study to confirm.
Remove Participants from Quotas
Remove participants from a study quota individually or in bulk so they are not assigned to any quota. Removing participants from a quota will NOT remove them from the study, and they can still be contacted or added to a different quota. You can also change which quota a participant is assigned to by using the Assign to quota action.
This can be done from Participants > Everyone, or from within each specific quota.
Select participants by checking the checkboxes next to their names.
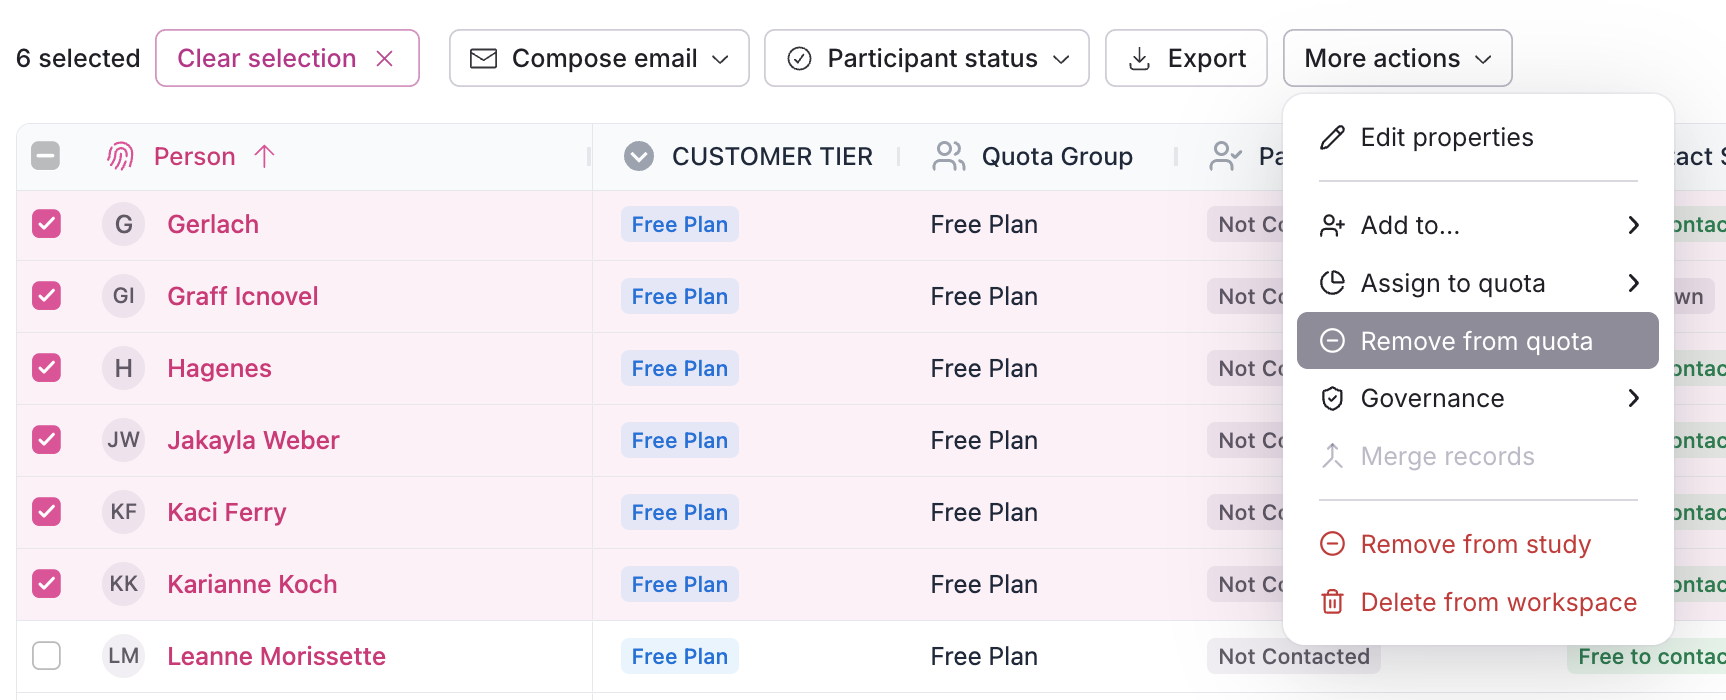
Select the More actions button at the top of the table.
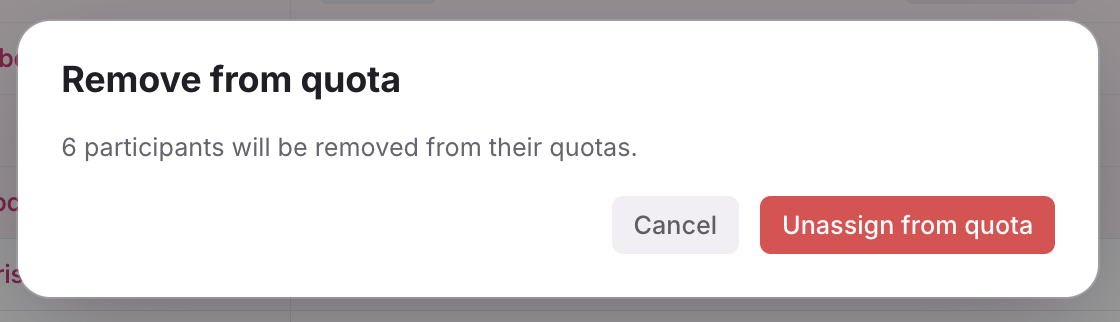
Select Remove from quota.
Review the warning, then select Unassign from quota to confirm.
Individually: Remove an individual participant from a quota by selecting the 3 dots ... next to their name to Remove from quota and confirm.
View Study Progress
Navigate to the study overview to view overall progress across participant quotas. Easily see all quotas, which are full or almost full, and track participant completion.
If you've enabled Show 'study closed' when quota is full (optional), quota groups will close automatically when its max limit is met for combined total of scheduled and completed activities. Participants may still be assigned to a quota, but won't be able to schedule an interview or start a test . Instead, they'll see a 'study closed' message.
Edit Study Quotas
Edit study to change quota names, max limits, delete or add new quotas.
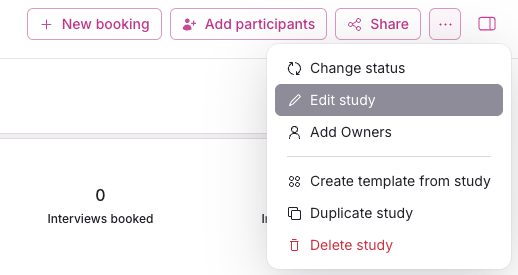
Open the study editor by selecting the 3 dots ... in the top right and Edit study.
Scroll down to edit participant quotas. Change quota names or adjust max limit.
Select the trash icon to delete a participant quota.
Deleting a participant quota will not remove assigned participants from the study or change their participant status. Participants from a deleted quota will remain in the study without any quota assignment.
Select + Add quota if you need to create more.
Select Update Study in the top right to apply your changes, or Exit and Discard.